Tag: VideoTutorials
Woven bars • Hardanger
Stem stitch
Whipped backstitch
Kloster blocks • Hardanger

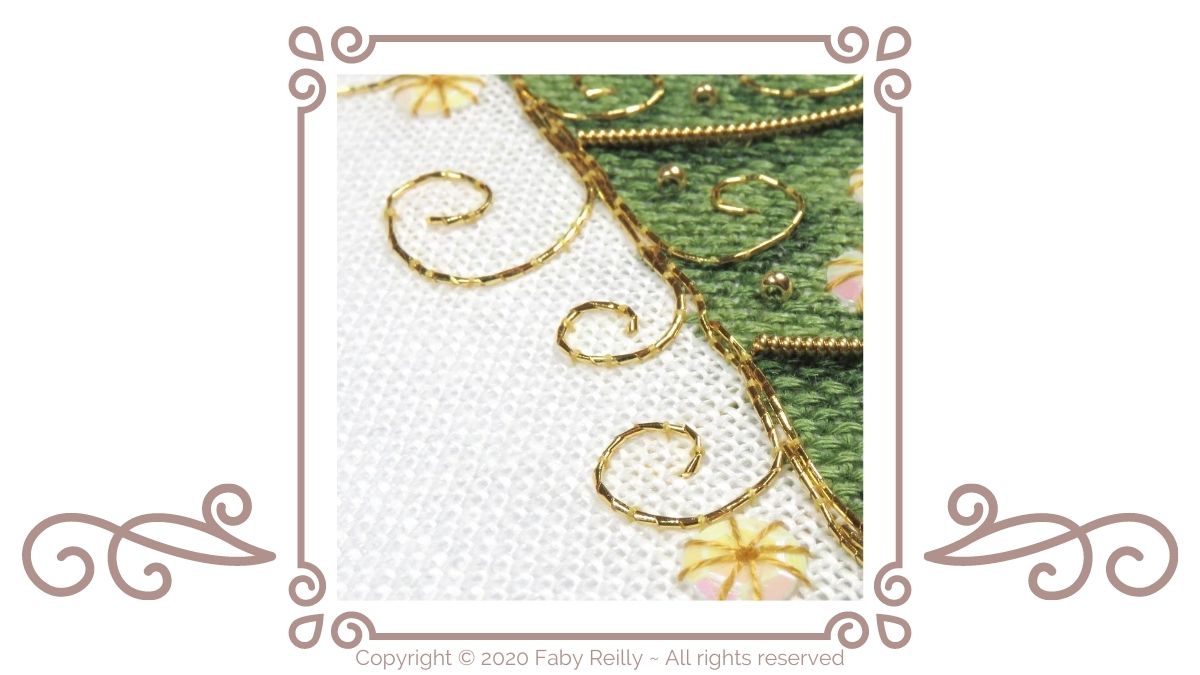
Couching • Pearl purl
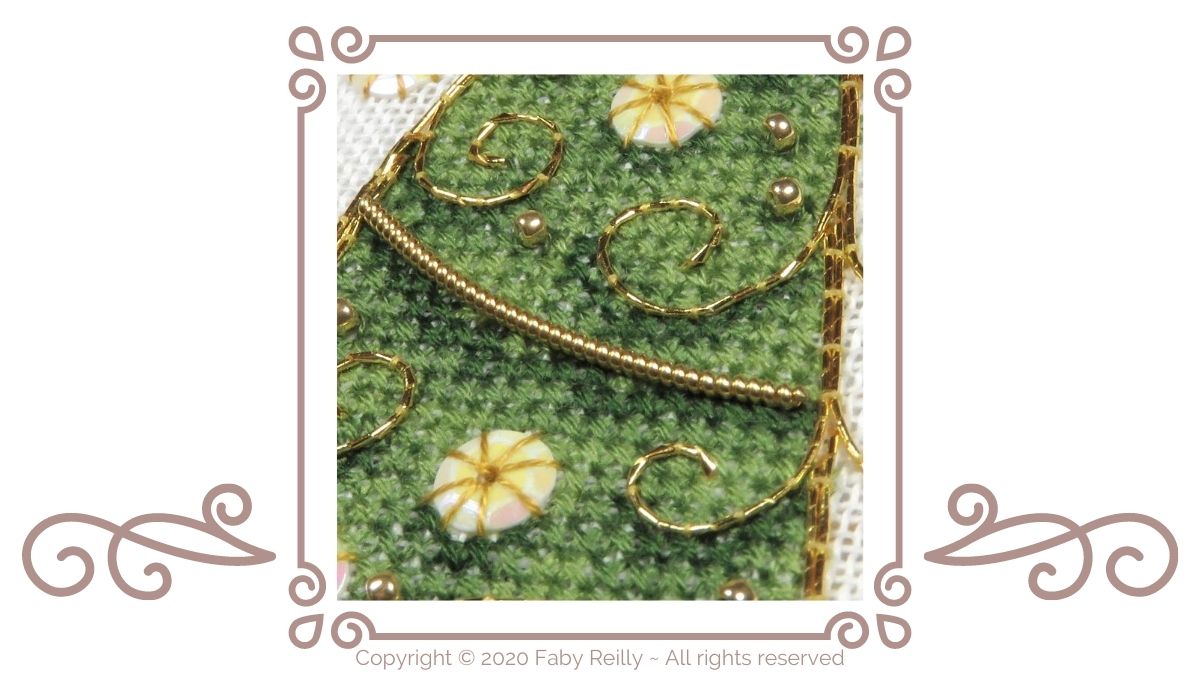
Couching • Japan thread
Woven Picot stitch
Buttonhole Cartwheel
Closed Buttonhole stitch

Bullion stitch

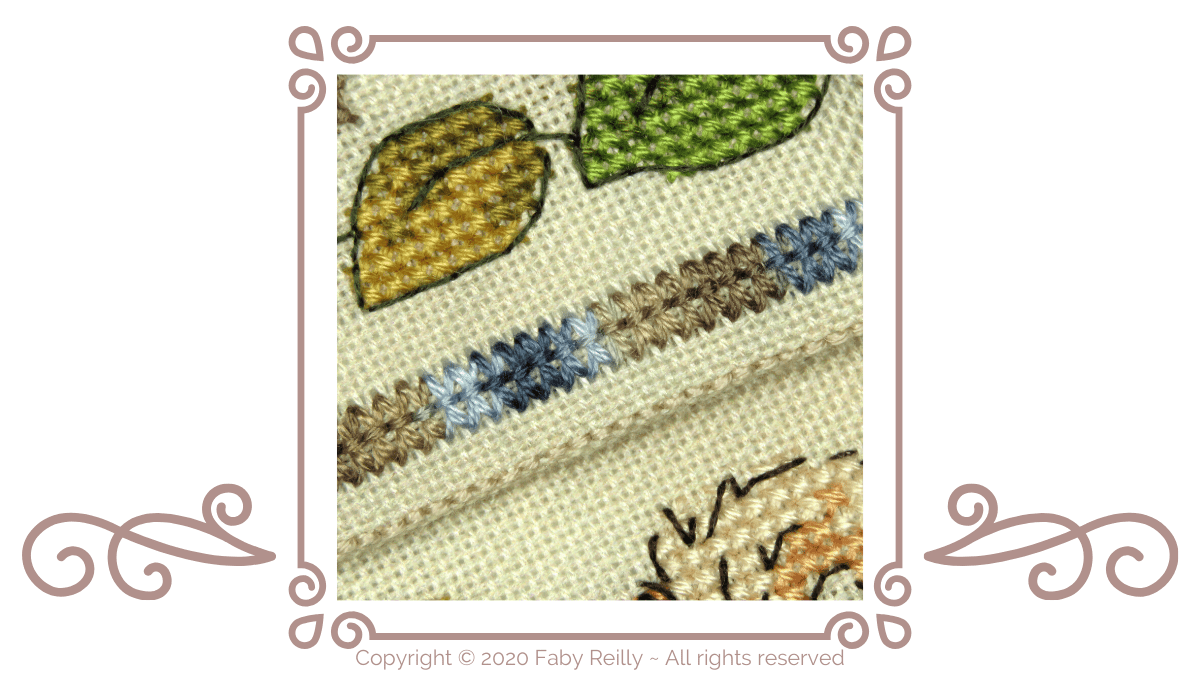
Tied Oblong stitch

Before you start, anchor the thread to a nearby stitch, on the back of the fabric, using the loop method (if you’re stitching with 2 strands of cotton). If you’re stitching with 1 strand only, then stitch a couple of knots around the back of a nearby stitch.
1 Start with stitching a cross-stitch, just as you would a sandard one, except that this one is elongated: it’s 3 times as long as a standard cross-stitch. Its size may vary from pattern to pattern, but in this example, it stretches over 2 x 6 threads of linen (or 1 x 3 aida blocks, depending on your choice of fabric).

2 Once the long cross-stitch is done, bring the needle back up to the right side of the fabric, to the right-hand side of the stitch, at mid-height. Stitch a horizontal backstitch across the oblong stitches to secure the long cross into place.

Fancy seeing it stitched in action? Here’s a short video:
Fancy trying out your new skills? Here’s a selection of patterns to do just that:


Shall we recap?

Happy stitching!

Rhodes Octagon stitch


Before you start, anchor the thread to a nearby stitch, on the back of the fabric, using the loop method (if you’re stitching with 2 strands of cotton). If you’re stitching with 1 strand only, then stitch a couple of knots around the back of a nearby stitch.
1 I normally like to finish Rhodes stitches with the vertical stitch, as it creates a much nicer finish. For the octagon variation, I think it looks a little odd, and I prefer to have a slanted stitch on top. It’s up to you, really. Either way, to get the starting point for the stitch, we need to rewinding back from the final stitch, whichever one you want that to be… I’ve opted for the following version:

Let’s get started, then: bring the needle out where the first stitch starts (1) and (looking at the full octagon stitch) work out where the first stitch ends (2). There’s our first diagonal stitch. The next step is another diagonal stitch, which lies over the previous one, slightly slanted clockwise:

2 Keep going clockwise, making sure the stitches are as neat as possible, each overlapping the previous one and keeping the tension as even as possible so that none of the stitches are looser than the others. You really want to be using a hoop or a stitching frame for this.

3 Place the last stitch to finish the octagon, and tie the thread at the back of the stitch:

Fancy seeing it stitched in action? Here’s a short video:
Fancy trying out your new skills? Here’s a selection of patterns do to just that:


Shall we recap?

Happy stitching!
Diamond Eyelet stitch
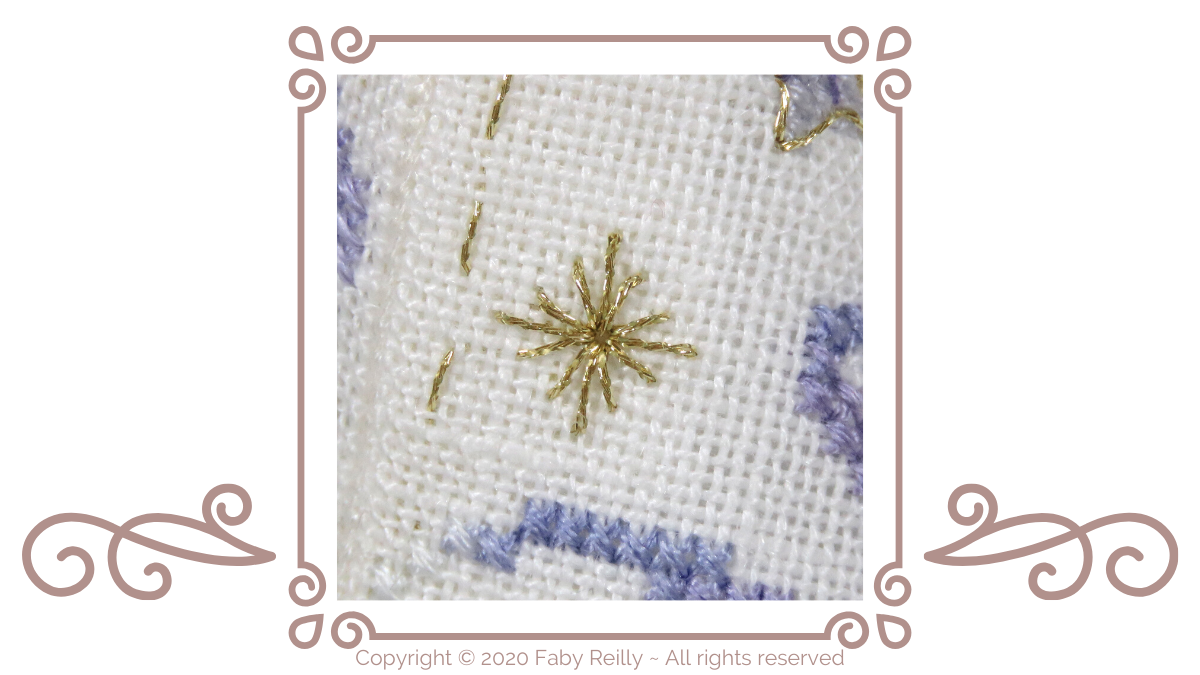

Plain Diamond Eyelet:
1 This stich is best stitched in 1 strand only, so you’ll need to anchor the thread to a nearby stitch, on the back of the fabric. We’re going to work the eyelet from the centre outwards, because it’s easier to count the threads of fabrics this way.
Bring the needle up in the centre of the stitch (#1 on the diagram below), push the needle back through to the back of the fabric in (#2) to stitch the first diagonal line. Bring the needle back up in the centre of the stitch (#3 – same hole as #1) and stitch the second diagonal stitch.

2 Keep going clockwise, always coming back through the centre of the stitch, saving the top vertical stitch for the end, for a neat finish:

3 Fasten the thread at the back of the eyelet by weaving it through the stitches at the back a few times and securing it with a couple of little knots. Find out how to do so here.

Sequin variation:
1 Even more so than the plain eyelet, the sequin variation must be stitched in 1 strand only, so that the sequin shows through the stitch and the hole of the sequin doesn’t get too crowded with thread. As for the plain version, anchor the thread behind a nearby stitch before you start. Now the stitch starts to differ: rather than working from the centre outwards, work from the outside of the stitch inwards. This is because of the sequin: it’s much easier to push the needle through the small hole of the sequin from the front (where you can see what you’re doing) than it is from the back (where you’re a bit blind). Also make sure you place the sequin so that it curves downwards against the fabric. This will allow the stitches to lie flat against the curved sequin, rather than be stretched over its hollow side.

2 Proceed clockwise, still always working from the outside of the stitch back to the centre. Finish the stitch, and tuck the thread at the back of the stitch using the same method as for the plain eyelet.

Fancy seeing it stitched in action? Here’s a short video:
Fancy trying out your new skills? Here’s a selection of patterns to do just that:


Happy stitching!
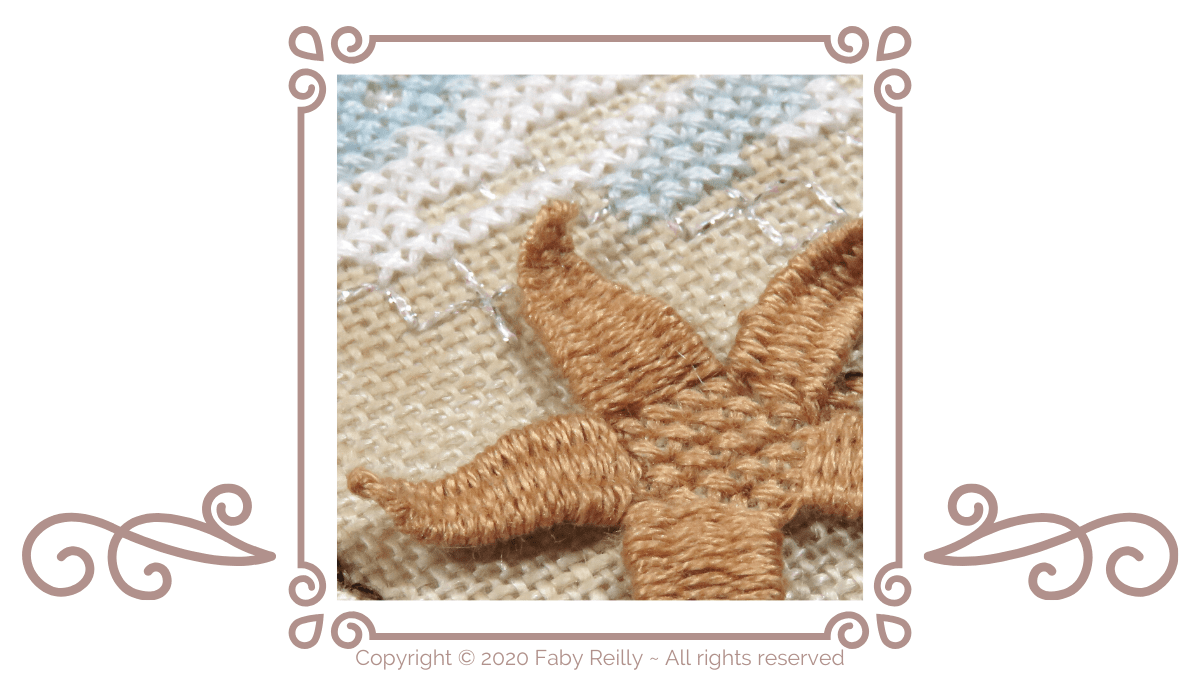
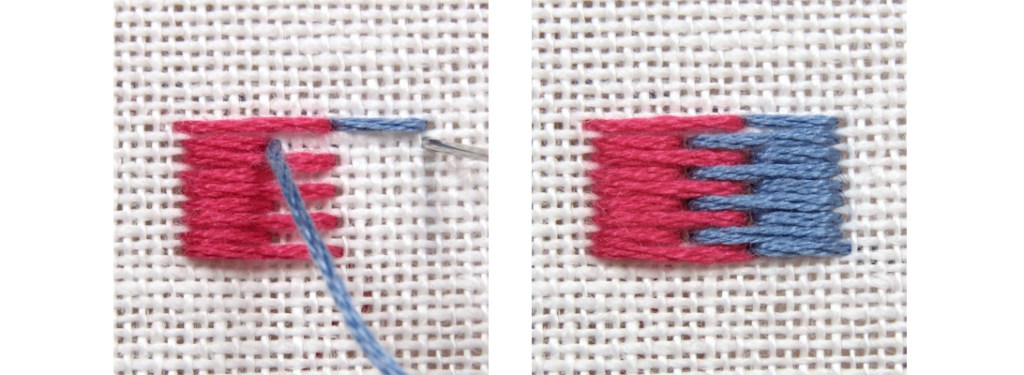
Long and Short stitch


Before you start, anchor the thread to a nearby stitch, on the back of the fabric.
1 This stitch is made of a series of simple straight stitches, so it’s actually a very straight forward stitch. Make sure that the stitches are always stitched in the same direction, and that horizontal stitches are worked column by column (as shown below), and vertical stitches are worked row by row. They must be stitched so close together that the fabric doesn’t show through the stitch. If you’re working on a large count fabric, and the coverage isn’t sufficient, increase the number of strands you’re working with (to make the stitches thicker).

2 Once the first column is stitched, move onto the next one – the pattern may or may not call for a change of colour at this stage. Follow the instructions provided on the pattern.
Fancy seeing it stitched in action? Here’s a short video:
Happy stitching!
Queen stitch

Before you start, anchor the thread to a nearby stitch, on the back of the fabric.
1 Steps 1 & 2: bring the needle out to the front of the fabric, at the base of the stitch (A), and push it back through to the back of the fabric at the top of the stitch (B). The trick to keep this stitch looking lovely and curvy is to keep the thread nice and supple: don’t over tighten the thread. The next step is to tack this first stitch into place, so bring out the needle in (3) and push it back through the fabric in (4), to tack the first vertical stitch to that strand of fabric.

2 Now repeat the process (making sure each vertical stitch is a little looser than the previous one) for the next 2 vertical stitches to the right:

3 When the right side is done, repeat the process to the left to complete the stitch:

Fancy seeing it stitched in action? Here’s a short video:
Fancy trying out your new skills? Here’s a selection of patterns to do just that:


Happy stitching!
Rhodes Butterfly stitch
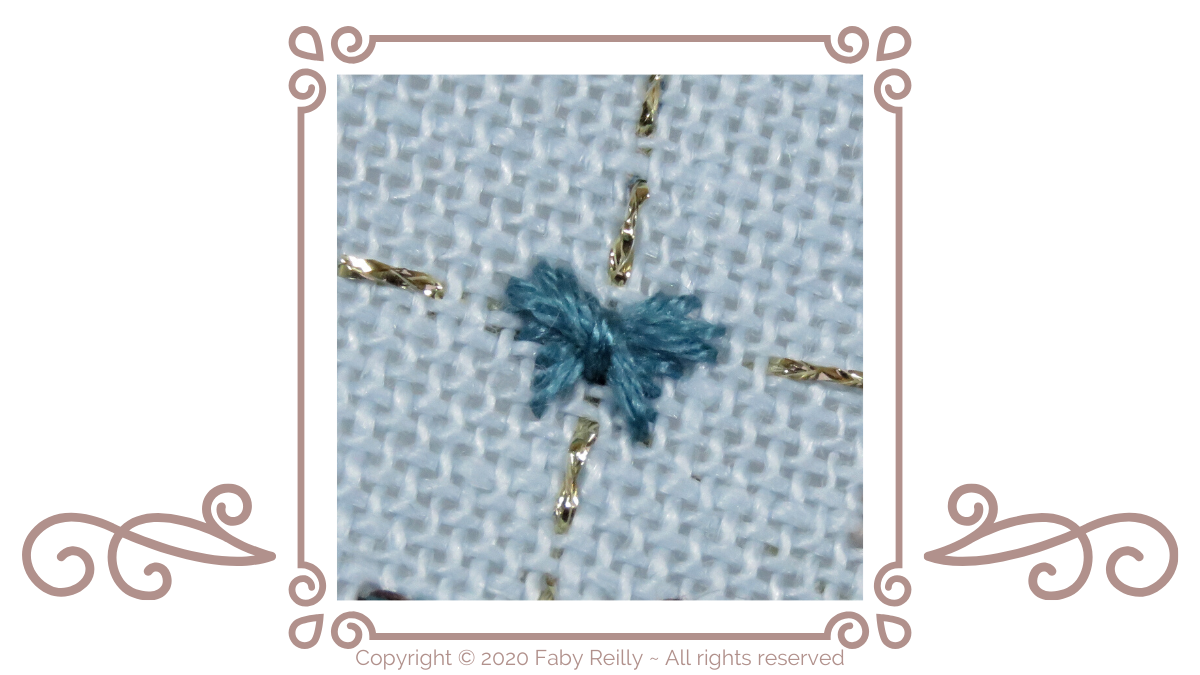

Before you start, anchor the thread to a nearby stitch, on the back of the fabric, using the loop method (if you’re stitching with 2 strands of cotton). If you’re stitching with 1 strand only, then stitch a couple of knots around the back of a nearby stitch.
1 The key to finishing any Rhodes stitch variation neatly is to save the vertical stitch for the very end. So to get the starting point for the stitch, we need to rewind back from the final stitch… and that gives us the bottom left corner of the butterfly:

Let’s get started, then: bring the needle out at the bottom left corner (1) and (looking at the full butterfly stitch) work out where the first stitch ends (2). There’s our first diagonal stitch. The next step is another diagonal stitch, which lies over the previous one, slightly slanted clockwise:

2 Keep going clockwise, making sure the stitches are as neat as possible, each overlapping the previous one and keeping the tension as even as possible so that none of the stitches are looser than the others. You really want to be using a hoop or a stitching frame for this.

3 By the time you reach the last stitch, the butterfly is so packed together that you may find it tricky to see the “19” and “20” holes. In that case, use a finger or another needle to gently nudge the previous stitches out of the way, so that you can see the relevant holes in the fabric:

Fancy seeing it stitched in action? Here’s a short video:
Fancy trying out your new skills? Here’s a selection of patterns to do just that:


Happy stitching!
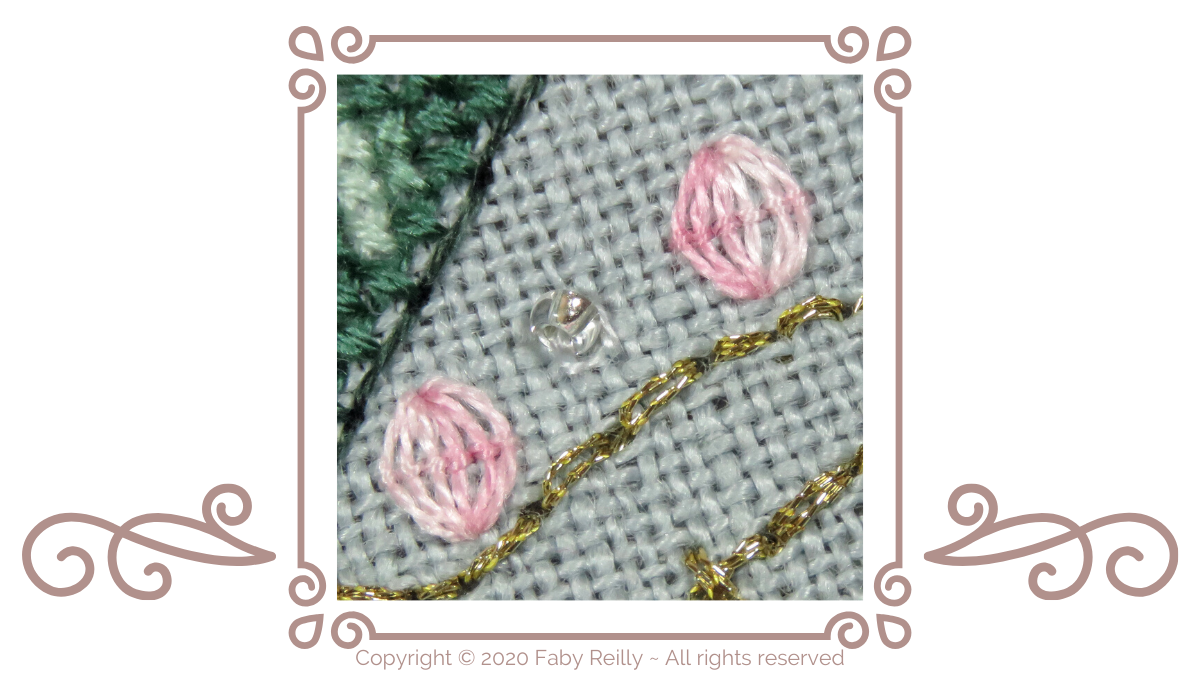
Lazy Daisy stitch
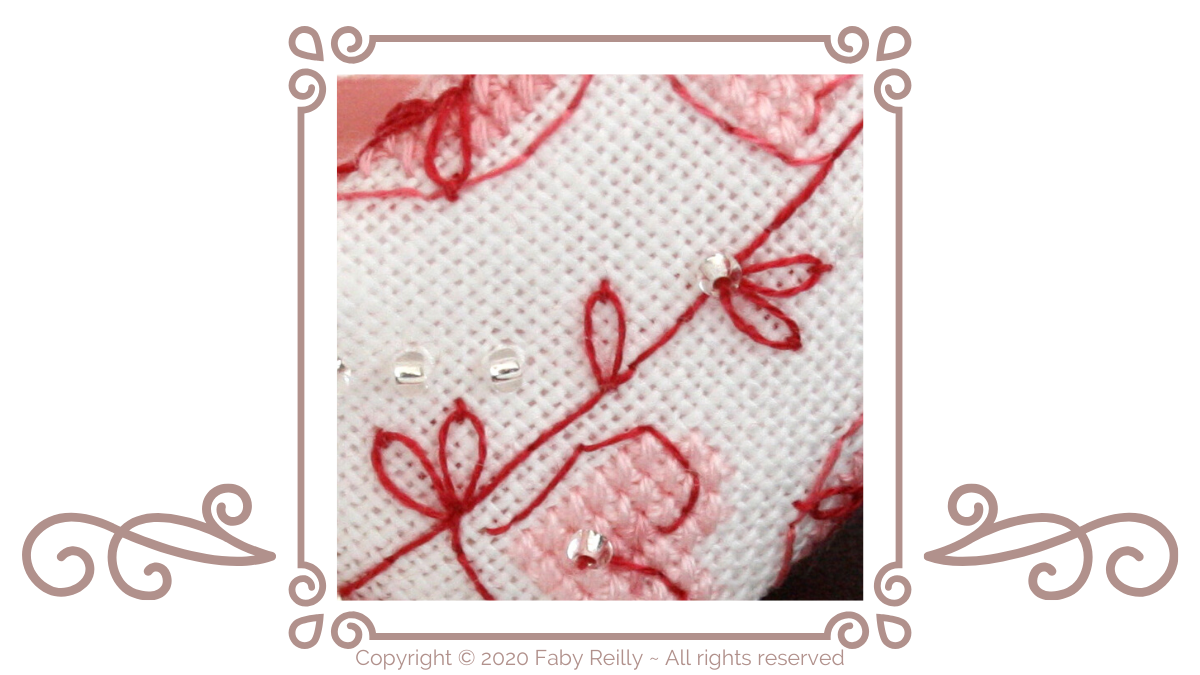

This very delicate stitch is best stitched in 1 strand, especially if it’s small, to keep it neat and well defined. But it can also work well with more strands, especially if the stitch is quite large, or if you want to make a bolder statement. Let’s look at how to stich it:
1 Bring the needle up to the front of the fabric where you want the base of the petal to be (ie. A on the picture below). Then create a loop with the thread (step 1), and push the needle through to the back of the fabric in A again. Bring the needle back up to the front of the fabric where you want the tip of the petal to be (B), making sure that the needle comes up inside the thread loop (step 2):

2 Pull the needle out, making sure that you gently tighten the loop: don’t over-tighten it so that the petal has a nice oval shape. Once you’re happy with the look of the petal, push the needle back through to the back of the fabric in the next available hole (C) to pin the tip of the stitch into place:

Fancy seeing it stitched in action? Here’s a short video:
Fancy trying out your new skills? Here’s a selection of patterns to do just that:
-
 Daisy BiscoBourse
 -
 Seasonal Wreaths (set of 4)
 -
 Wintry Blooms Tissue Case
 -
 Wintry Blooms Biscornu
 -
 Victorian Christmas Humbug
 -
 Love Biscornu
 -
 Butterfly Needlebook
 -
 Winter Wreath
 -
 Butterfly Scissor Case
 -
 Love Bookmark
 -
 Butterfly Biscornu
 -
 Love Humbug
 -
 Victorian Christmas Frame
 -
 Sweet Heart Sachet
 -
 Sweet Heart Bookmark
Shall we recap?

Happy Stitching!
Round Eyelet stitch
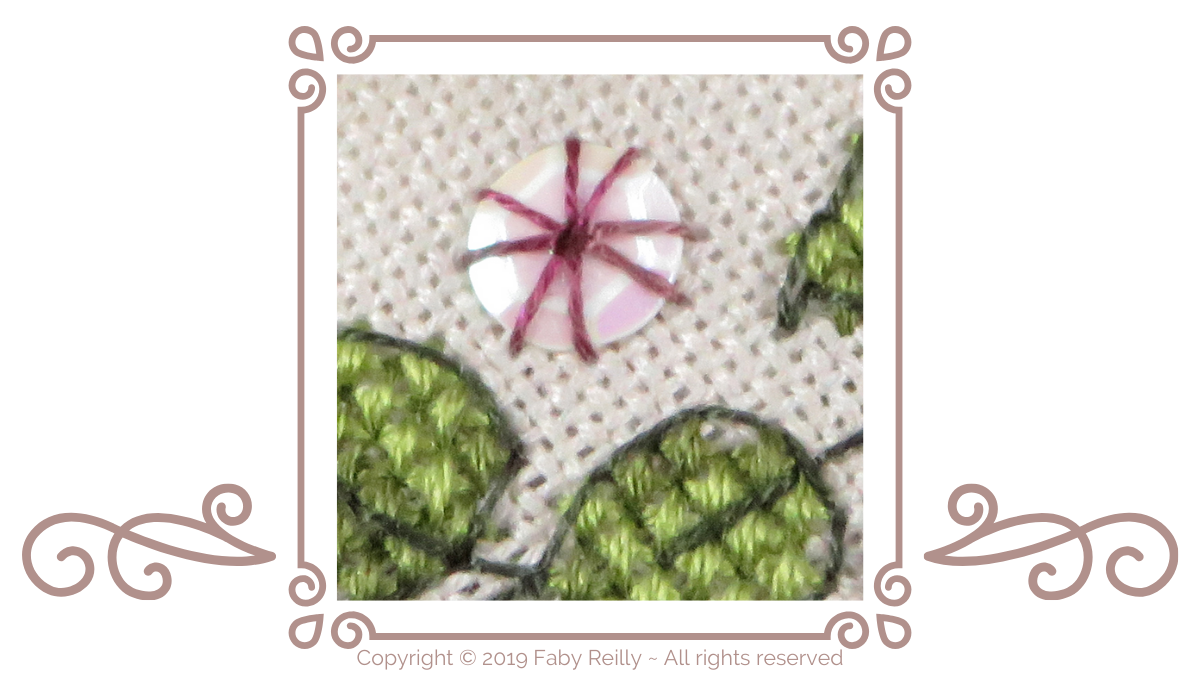

Plain Round Eyelet:
1 This stitch is best stitched in 1 strand only, so you’ll need to anchor the thread behind a nearby stitch. We’re going to work it from the centre outwards, because it’s easier to count the threads of fabric this way:

2 Bring the needle back up in the centre of the stitch (#1 on the diagram above) and stitch the next diagonal stitch. Keep going, clockwise, always coming back up through the middle.

3 Fasten the thread at the back of the eyelet by weaving it through the stitches at the back a few times and securing it with a couple of little knots. Find out how to do so here.

Sequin variation:
1 Even more so than the plain eyelet, the sequin variation must be stitched in 1 strand only, so that the sequin shows through the stitch and the hole of the sequin doesn’t get too crowded with thread. As for the plain version, anchor the thread behind a nearby stitch before you start. Now the stitch starts to differ: rather than working from the centre outwards, work from the outside of the stitch inwards. This is because of the sequin: it’s much easier to push the needle through the small hole of the sequin from the front (where you can see what you’re doing) than it is from the back (where you’re a bit blind). Also make sure you place the sequin so that it curves downwards against the fabric. This will allow the stitches to lie flat against the curved sequin, rather than be stretched over its hollow side.

2 Proceed clockwise, still always working from the outside of the stitch back to the centre. Finish the stitch, and tuck the thread at the back of the stitch using the same method as for the plain eyelet.

Fancy seeing it stitched in action? Here’s a short video:
Fancy trying out your new skills? Here’s a selection of patterns to do just that:
-
 Zoe Box
 -
 Anthea Floral Calendar pattern
 -
 Lizzie Stitching Wallet
 -
 Peacock Stitching Set
 -
 Nerida Stitching Wallet SAL
 -
Daisy BiscoBourse
-
 Christie Mini Frames (set of 6)
 -
 Cherry Blossom Cushion
 -
 Lilac Stitching Set
 -
 Zoe Pincushion & Weights SAL pattern
 -
Wintry Blooms Tissue Case
-
Wintry Blooms Biscornu
-
Victorian Christmas Humbug
-
 Wisteria Biscornu
 -
 Marie-Annick Book Cover pattern
Shall we recap?

Happy stitching!
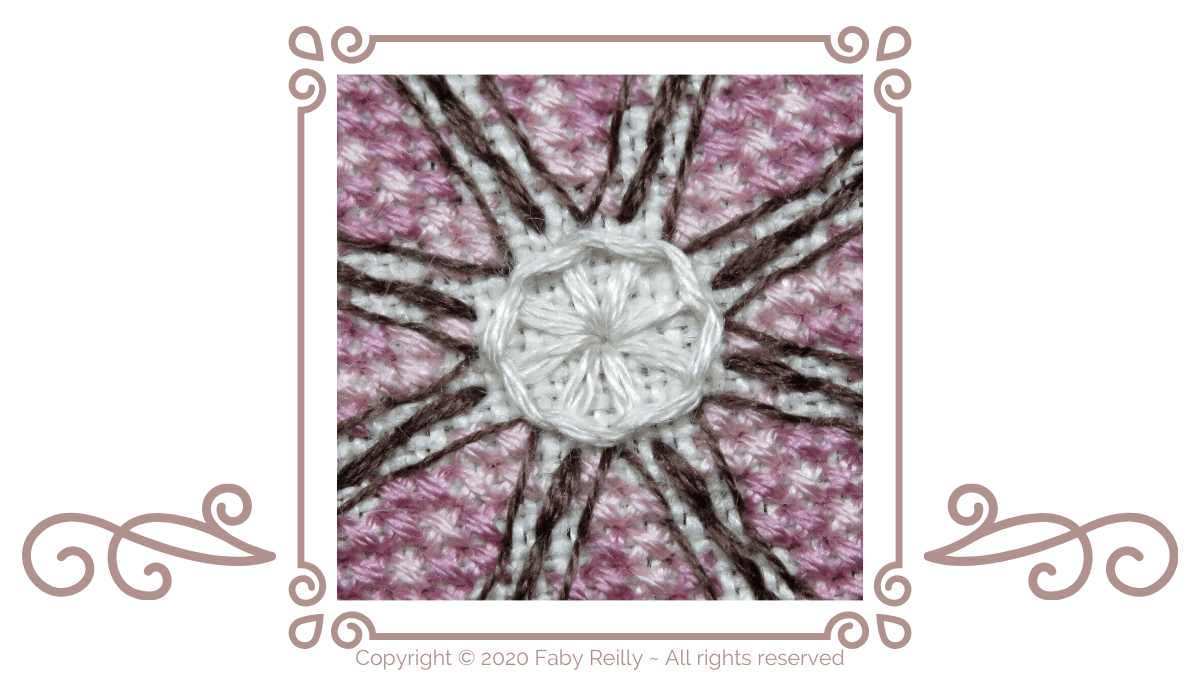
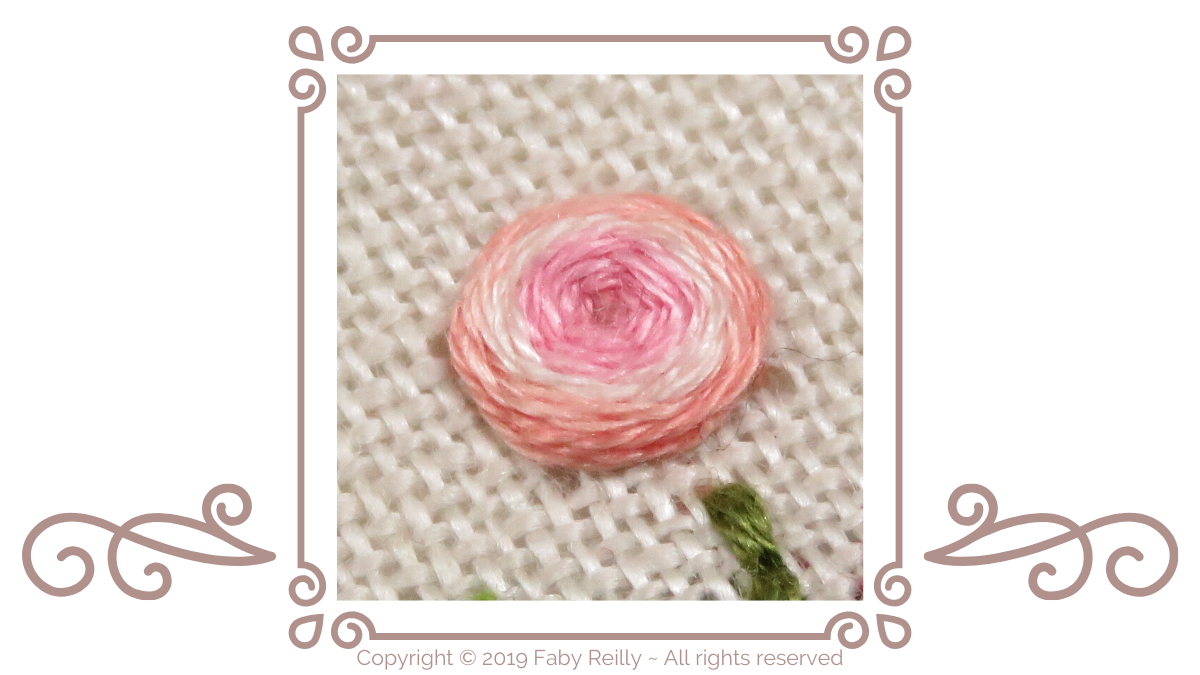
Ribbed Spiderweb stitch
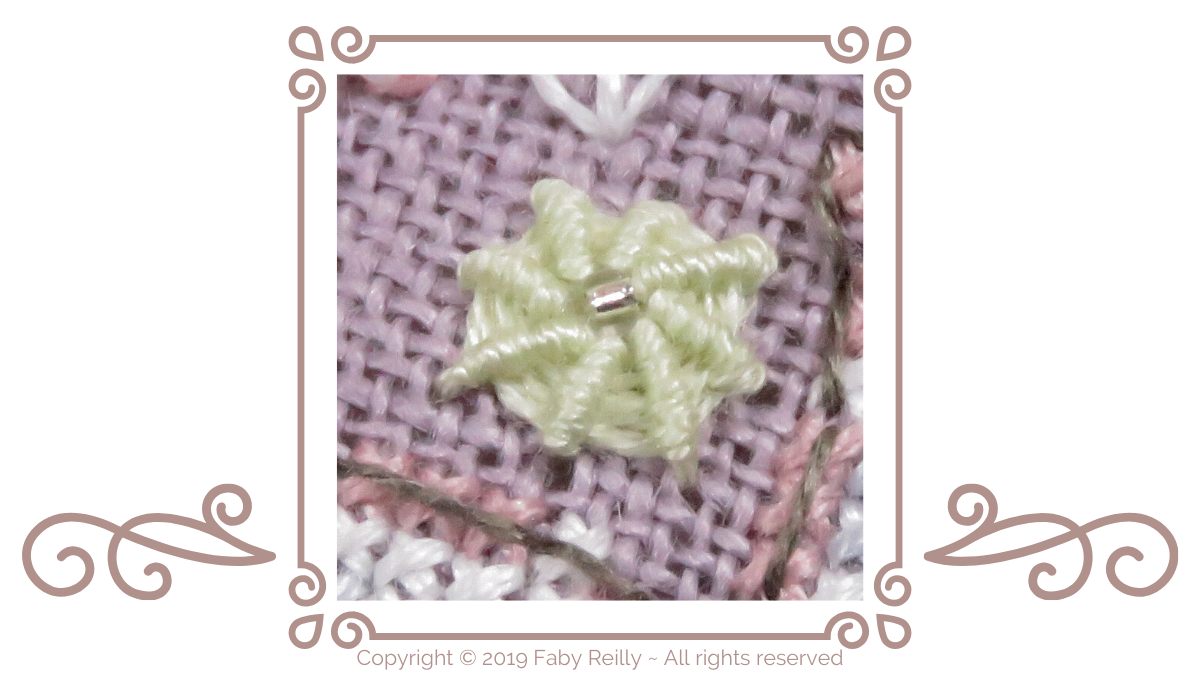

1 Build the star shape that will act as a frame for the stitch. For the standard Spiderweb stitch, it’s vital to use an odd number of “arms & legs” to stitch this star, otherwise the stitch doesn’t work. But for the ribbed version, it really doesn’t matter. The stitch works either way! So I like to use an even number of “arms & legs” for the ribbed version – just because I can!
Bring the needle up through the fabric, in the centre of the stitch, then stitch 8 “arms & legs” clockwise.
Push the needle back through to the front of the fabric, in the centre of the stitch.
[NOTE: In the photographs, I’ve used 2 different colours of thread, to clearly show the difference between the two main stages to stitching this stitch, but it should really be stitched using 1 single colour]

2 Now we can start working on the visible part of this pretty stitch – we’re going to weave the needle through the “arms & legs” of the star frame, with little backwards loops to create the “ribs”.
Let’s break it down:
- push the needle under 2 of the arms
- pull it out
- do a backwards loop around the 2nd of these 2 arms
- push the needle under 2 arms again (the one with the loop + a new one)
- keep going: forwards 2, backwards 1, forwards 2, backwards 1, etc. until the “arms & legs” are fully hidden under the stitch.


Fancy seeing it stitched in action? Here’s a short video:
Fancy trying out your new skills? Here’s a selection of patterns to do just that:
Happy stitching!
Spiderweb stitch

1 Build the star shape that will support the stitch.
For the standard Spiderweb stitch, we need an odd number of “arms & legs” to this star otherwise it’s simply not possible to stitch it. So, bring the needle up through the fabric, in the centre of the stitch, then stitch 5 “arms & legs” clockwise.
Make sure you finish by pushing the needle back through to the front of the fabric, in the centre of the stitch.
[NOTE: In the photographs, I’ve used 2 different colours of thread, to clearly show the difference between the two main stages to stitching this stitch, but it should really be stitched using 1 single colour]

2 Now we can start working on the visible part of this pretty stitch: we’re going to weave the needle through the “arms & legs” of the star frame, making sure to alternate going under/over/under/over them:

It is vital to work with an odd number of “arms and legs”, so that the weaving is staggered. With an even number, we would end up always going under and over the same “arms & legs”, and we wouldn’t get a nice rounded effect.
Keep weaving the thread around the stitch until it’s nicely packed and the “arms & legs” are fully hidden under the stitch.
Fancy seeing it stitched in action? Here’s a short video:
Fancy trying out your new skills? Here’s a selection of patterns to do just that:


Happy stitching!