
1 Build the star shape that will support the stitch.
For the standard Spiderweb stitch, we need an odd number of “arms & legs” to this star otherwise it’s simply not possible to stitch it. So, bring the needle up through the fabric, in the centre of the stitch, then stitch 5 “arms & legs” clockwise.
Make sure you finish by pushing the needle back through to the front of the fabric, in the centre of the stitch.
[NOTE: In the photographs, I’ve used 2 different colours of thread, to clearly show the difference between the two main stages to stitching this stitch, but it should really be stitched using 1 single colour]

2 Now we can start working on the visible part of this pretty stitch: we’re going to weave the needle through the “arms & legs” of the star frame, making sure to alternate going under/over/under/over them:

It is vital to work with an odd number of “arms and legs”, so that the weaving is staggered. With an even number, we would end up always going under and over the same “arms & legs”, and we wouldn’t get a nice rounded effect.
Keep weaving the thread around the stitch until it’s nicely packed and the “arms & legs” are fully hidden under the stitch.
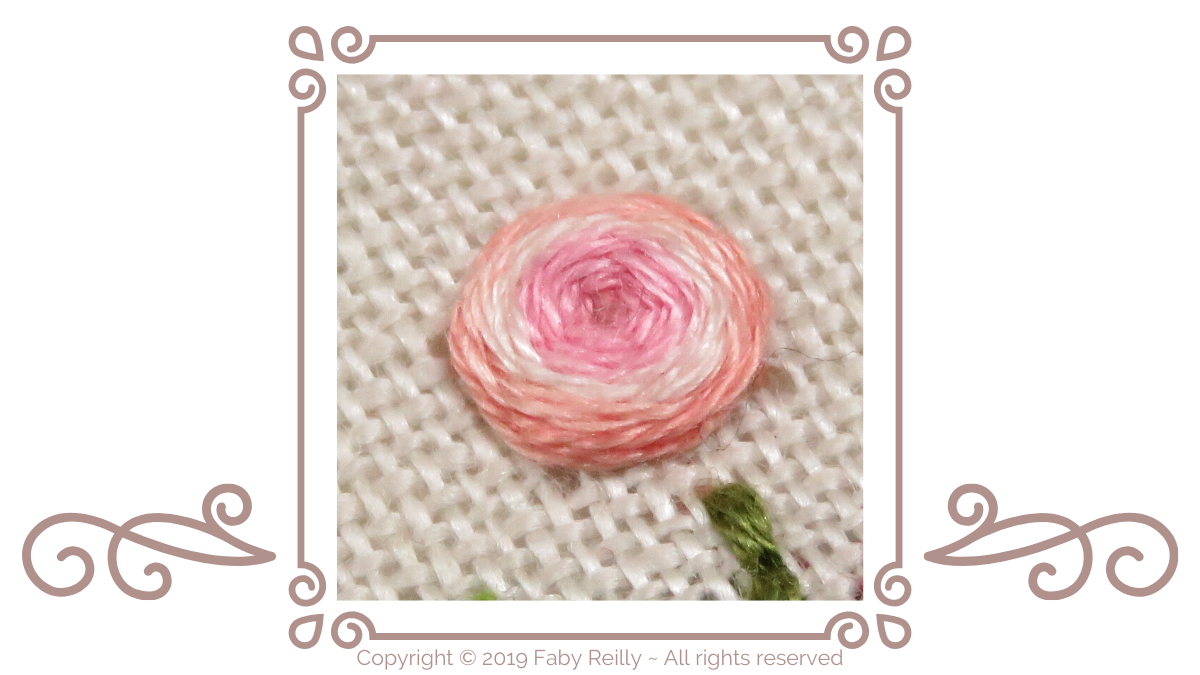
FUN TIP: stitch this stitch using variegated thread to achieve a lovely gradient!
Fancy seeing it stitched in action? Here’s a short video:
Fancy trying out your new skills? Here’s a selection of patterns to do just that:


Happy stitching!
