Tag: Biscornus
What’s a biscornu?

I’ve been asked this question so often that it’s high time I should go into a detailed answer rather than just a quick one. But what we all really want to know is what on earth you’re supposed to do with them!

“Biscornu” is a funny word, isn’t it. It’s a french word, and it means “which has an irregular, strange shape” (source)
Aaaaah, now it makes more sense 😉 !
Yep, so a biscornu is a little cushion made of 2 stitched squares, like a standard cushion, except that they’re not assembled into a normal square pillow, they’re assembled into a wonky pillow.
To see how that’s done, do read the Biscornu tutorial.
I don’t know who thought this up in the first place (ie. how to make a biscornu out of 2 squares of fabric) but it’s a brilliantly fun idea. To the best of my knowledge, these cute little cushions first appeared in France in 2004, and they went viral in 2008. (source)
What do you mean “but what’s the point of them“?
They’re small & they’re cute, isn’t that enough!? No… I didn’t think so, either. There’s only so many ornaments one can put up with. Agreed.
So let’s see what we can make with these little biscornus:
1. a plain ornament
Obviously. Still counts, doesn’t it – they can be soooo pretty 🙂

Featured biscornu: Let it Snow Biscornu
2. a pomander
You simply need to fill it with dried lavender.

Featured biscornu: Lavender Biscornu
3. a pin cushion
Depending on their size, you can use a biscornu as a free-standing pin cushion, or as a scissor fob (to make a tiny pin cushion). Or you can use it teamed up with a thread catcher!


Featured biscornus: Wild Rose Biscornu, Snowdrop Scissor Fob (mini biscornu), Apple Blossom Biscornu
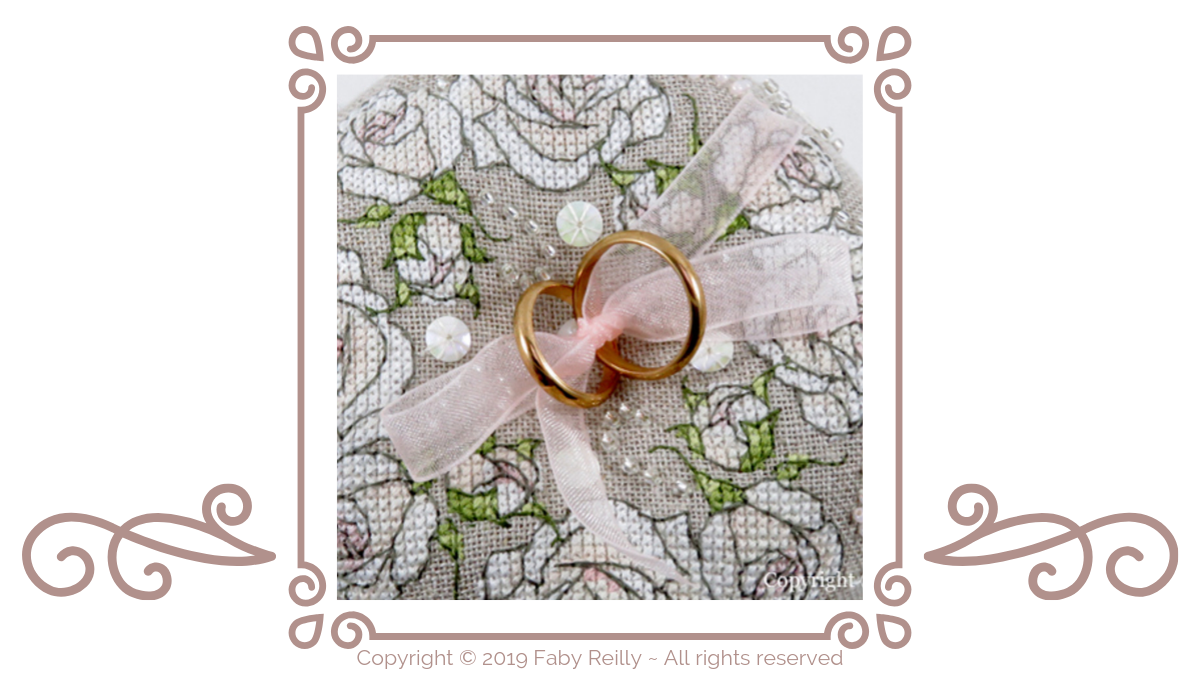
4. a wedding ring pillow
I love that idea! The shallow centre is the perfect shape to tie two wedding rings with a pretty ribbon.


Featured biscornus: Sweet Roses Biscornu, White Lily Biscornu, Sepia Rose Biscornu
5. a paperweight
You simply need to fill them with something heavy enough – Granulex Soft stuffing granules are perfect for the job.

Featured biscornu: Cornflower Biscornu
6. a towel holder
Especially cool if you can match the biscornu to the towel 🙂

Featured biscornu: High Seas Biscornu
7. a necklace
And whyever not? It only works with tiny biscornus, fair enough, but nobody said tiny wasn’t allowed!!


Featured biscornu: Rose Chocolat Stitched Jewellery
8. a Christmas tree bauble
It’s almost round in shape, so it’s pretty cool to decorate a Christmas tree.

Featured biscornu: Snowmen Biscornu
9. a framed picture
Yes, some of them do look really pretty in a frame!! (I do realise it kind of defeats the object of a biscornu, but still, it’s worth mentioning that you can frame them!)
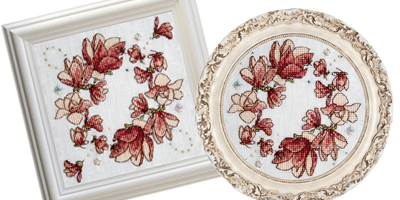
Featured biscornu: Magnolia Biscornu
10. a hand warmer
This is a really cool idea brought to us by Kate from Kate’s Threads: fill the biscornu with rice, dried corn (not popcorn!!), flaxseed or any other filling you can heat up in the microware, and it’ll make a fabulous handwarmer! Thanks Kate for this great idea!
Do you have more ideas? Do post them in the comments below 🙂
A few design ideas you may like, for which this method works really well:


How to sew on the centrepiece of a biscornu
Have you ever sewn a crystal or a button in the centre of a biscornu…? If so, then chances are you’ve experienced the frustration of 2 hands being insufficient to pinch the biscornu down AND stitch the centrepiece on tight enough! Here’s a way to do achieve this, easy peasy lemon squeezy style 🙂
You know what I mean: you squeeze the nicely stuffed biscornu in the centre, and as you get to stitch the crystals together, you HAVE to let go sooner or later to thread a crystal on, and pfffffffew the wretched thing puffs itself up again! It’s a battle of wills. And I don’t do sweating over a battle of wills against a biscornu: somehow, it doesn’t sound very heroic, does it!
So here’s a way to do it, without breaking a sweat 😉
1. You need a biscornu, a couple of crystals (buttons, or any other decoration you wish to use), and some polyester thread as stranded cotton isn’t strong enough for this job:

2. On one side of the biscornu, find the centre. Use the loop method to attach the thread over a good few strands of fabric (if all the pressure is on a couple of strands only, they risk tearing):

3. Pinch the biscornu in the centre with one hand, and stitch through to the other side with the other hand (keep going back and forth a good 3 or 4 times) WITHOUT using the crystals! Make sure the hollow is nice and deep. Then still holding the biscornu with your left hand (or right hand if you’re left-handed), give it a few loop knots to stop the thread from becoming loose again. Now, you can let go!! And don’t worry if it looks a little messy in the centre – we still have to attach the crystals which will hide any imperfection 😉

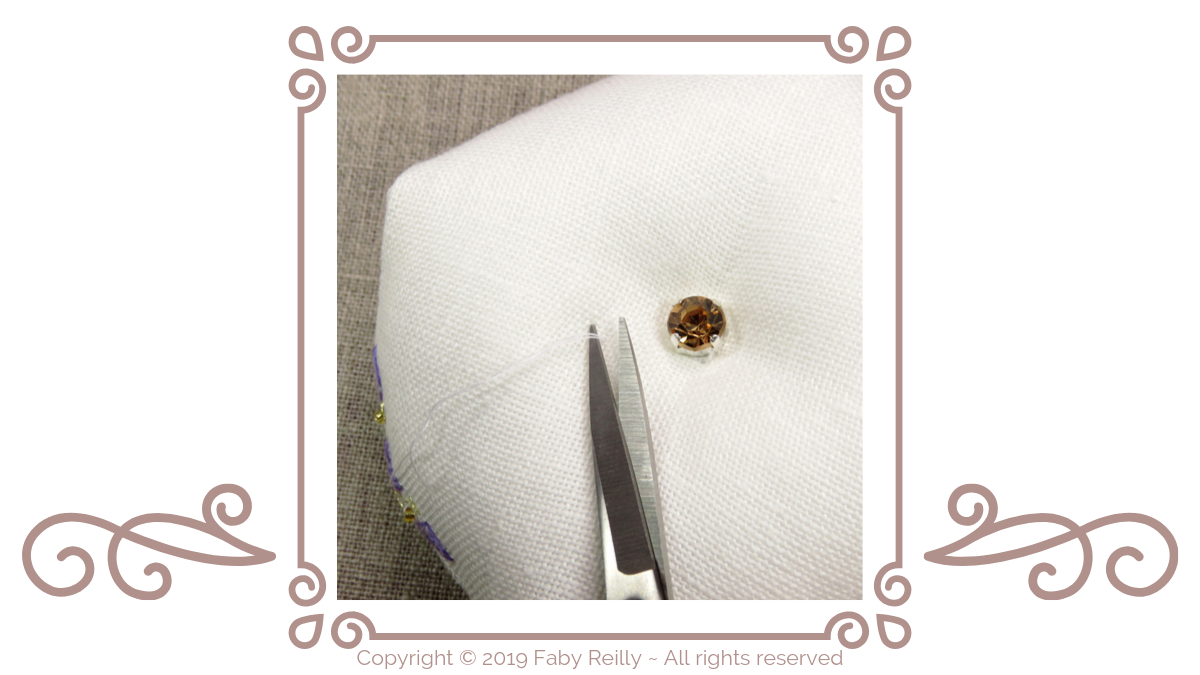
4. Now that you’ve so easily won the first battle (what a smug feeling!), you’re ready for round 2: sew on the crystals, one on each side. You don’t even need to sew them on super tight, as the biscornu will retain its shape no matter what, now. You just need to make sure they don’t wobble about. And when you’re done, give the thread a couple of loop knots again, under the crystal, and push the needle out as far as you can, away from the crystal:

5. Pull the thread, and at the same time, snip it as close to the fabric as possible. Once cut, the thread will spring back into the biscornu and remain out of sight. Perfect!

[I know, I couldn’t hold the thread AND the scissors AND the camera, so I did have to let go of the thread – but you make sure you pull it tight, though 😉 !! ]

There, didn’t I tell you? Easy peasy lemon squeezy 😉
A few design ideas you may like, for which this method works really well:


How to stitch the outline of a biscornu
If you’re stitching something that has to be assembled biscornu style, and you hate having to count those endless stitches to make sure your square IS STILL a square by the time it’s done, then here’s a really cool trick for you!
That dreaded backstitch outline. Often stitched white on white (some designers just don’t have any consideration for their stitchers, do they 😉 !! Ooops, so sorry… really 😉 !) How are you supposed to see those stitches, never mind count them!? And if you make a mistake at the start, you’ve had it, and you’ve got to do it all over again… Grrrr… Been there too, don’t worry. I model stitch my own designs 😉 !! You wouldn’t believe how many times I’ve had to start over again. Usually that involves a fair amount of swearing…
So I tried concentrating better… no chance. I did NOT try drawing the grid on the fabric with those funky pens that vanish (my faint heart wouldn’t take it, should those lines fail to fade or should they somehow come back to haunt me…!!). I tried stitching a single strand of contrasting thread every 10 stitches… and decided it was way too much hassle to have to stitch 2 outlines, one of which was going to have to be taken out at the end anyway… what a waste of time! And that’s when it hit me:
WHY ditch the second outline!?
Those graduations are really useful even when you’ve finished stitching and you’re assembling the biscornu (or humbug, or whatever else). Fair enough, we can’t keep a contrasting thread in there, because it’ll show, so you see what I’m getting at? That’s right, a 2-in-1 solution 🙂 You stitch the graduation AND the backstitch outline TOGETHER, on the outside, so it doesn’t show when assembled, and you don’t have to unpick it!!! Winner 🙂 !!
Here is goes:
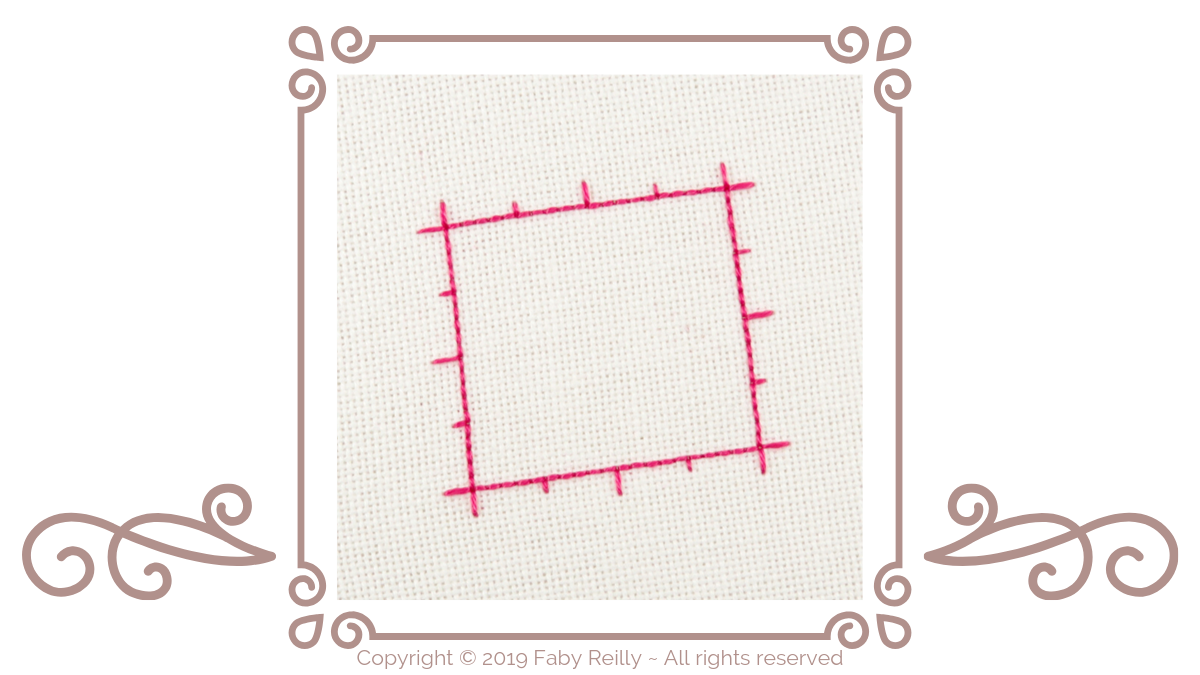
1. Use the loop method (explained HERE) to start your backstitch line, and begin with a vertical stitch (over 4 strands of fabric). Then stitch 5 normal backstitch stitches:

2. Stitch 1 vertical stitch (over 2 strands of fabric). That’s your 5s marker:

3. 5 stitches later, stitch another vertical stitch (over 4 strands of fabric), that’s your 10s marker. Etc… You’re basically stitching a ruler 🙂

4. And you keep going until you’ve finished the outline!! To stop the backstitch outline, you can use the method explained HERE.

Those graduations will be there the whole time to help you assemble the biscornu (quite useful when you have to find the EXACT middle of one of the sides 😉 !!!), and they’ll be hidden inside the hems, once assembled.
A few design ideas you may like, for which this outline method works really well:
-
 Naughty Kittens Glasses Case pattern
 -
 Zoe Pincushion & Weights SAL pattern
 -
 Christmas Gnome Glasses Case pattern
 -
 Thanksgiving Gnome Glasses Case pattern
 -
 Olive Tree Biscornu pattern
 -
 Butterfly Wreath Biscornu pattern
 -
 Bon Voyage Mini Suitcase pattern
 -
 Anchored in the Sand Glasses Case pattern
 -
 Sun & Moon Biscornu pattern
 -
 Festive Ribbon Humbug patterns