


In a previous article, we looked at how to use a small embroidery hoop, but that doesn’t help us much for large projects. For those, here’s a useful way to place your fabric onto an oblong stitching frame, so that your fabric remains clean as you stitch 🙂
You’ll need:
- a wooden stitching frame
- some stitching fabric (linen, evenweave or aida)
Ready?
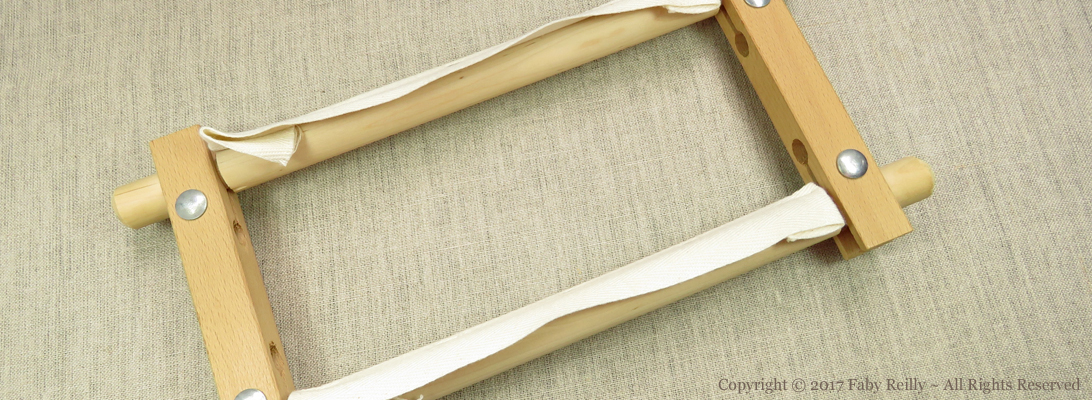
1. You need this type of stitching frame, with 2 removable rods. Make sure that both rods are positioned so that the twill tapes (on which to tack the fabric) are directed towards you. NOT facing each other.

2. Then prepare your fabric. This is optional – you can stitch without doing anything to the outside (I often do, to be honest, but as I’m writing a tutorial here, I might as well be thorough 😉 !!)
So iron it, and hem it. (Here, I’ve used my overlocker, but you can just as well do a zig-zag stitch with your sewing machine, or even just a simple whip stitch by hand.)

3. Place your fabric over twill tape on the upper rod, and whip-stitch it keeping the fabric as straight as possible.

4. Now here’s what to avoid! Don’t wrap the fabric over the lower rod as you’ve done for the top one.

Instead, wrap the fabric under the rod and back over. Whip-stitch it in place.

Why do this? (After all, the instructions that come with the frame often tell you to go over both rods. Why do it this weird way?…)
The main reason is to keep your fabric clean: as you’re stitching, your hands will be resting on the lower rod, you’re likely to touch it to turn your frame over, etc. Over time, there’s a real risk that the fabric gets grimy… Not good. If it’s curled up on itself, and the back is showing, it doesn’t matter so much, does it 🙂
The second reason is more like a positive side-effect than an actual goal: it tilts the fabric in a slightly more upright position, which makes it more comfortable to stitch 🙂
6. Now that your fabric is mounted on your stitching frame like a scroll, roll it up to make it taut and tighten the screws at the back of the frame.

Et voilà !
A few design ideas you may like, for which this method works really well:


