 Butterfly Biscornu
The result is sufficiently similar that you can use one or the other regardless, but the method is quite different – which one has your vote? If you don’t care very much for French knots, try your hand at Colonial knots!
Before we start… here’s a quick tip, which you might find REALLY helpful if you’re struggling with French knots…


French Knot:
Let’s have a look at French knots first, as they are more commonly used. I’m using 4 strands here, so that the knots are big enough for their shape to show clearly.
1 Twist the thread around the needle 3 times:


2 Tighten the thread around the needle and keep it tight with your left hand (or right hand if you’re left-handed), then push the needle down through the fabric 1 strand of fabric away (diagonally) from where you started the stitch. Take care NOT to go through the initial hole, otherwise the knot might get dragged through to the back of the fabric.


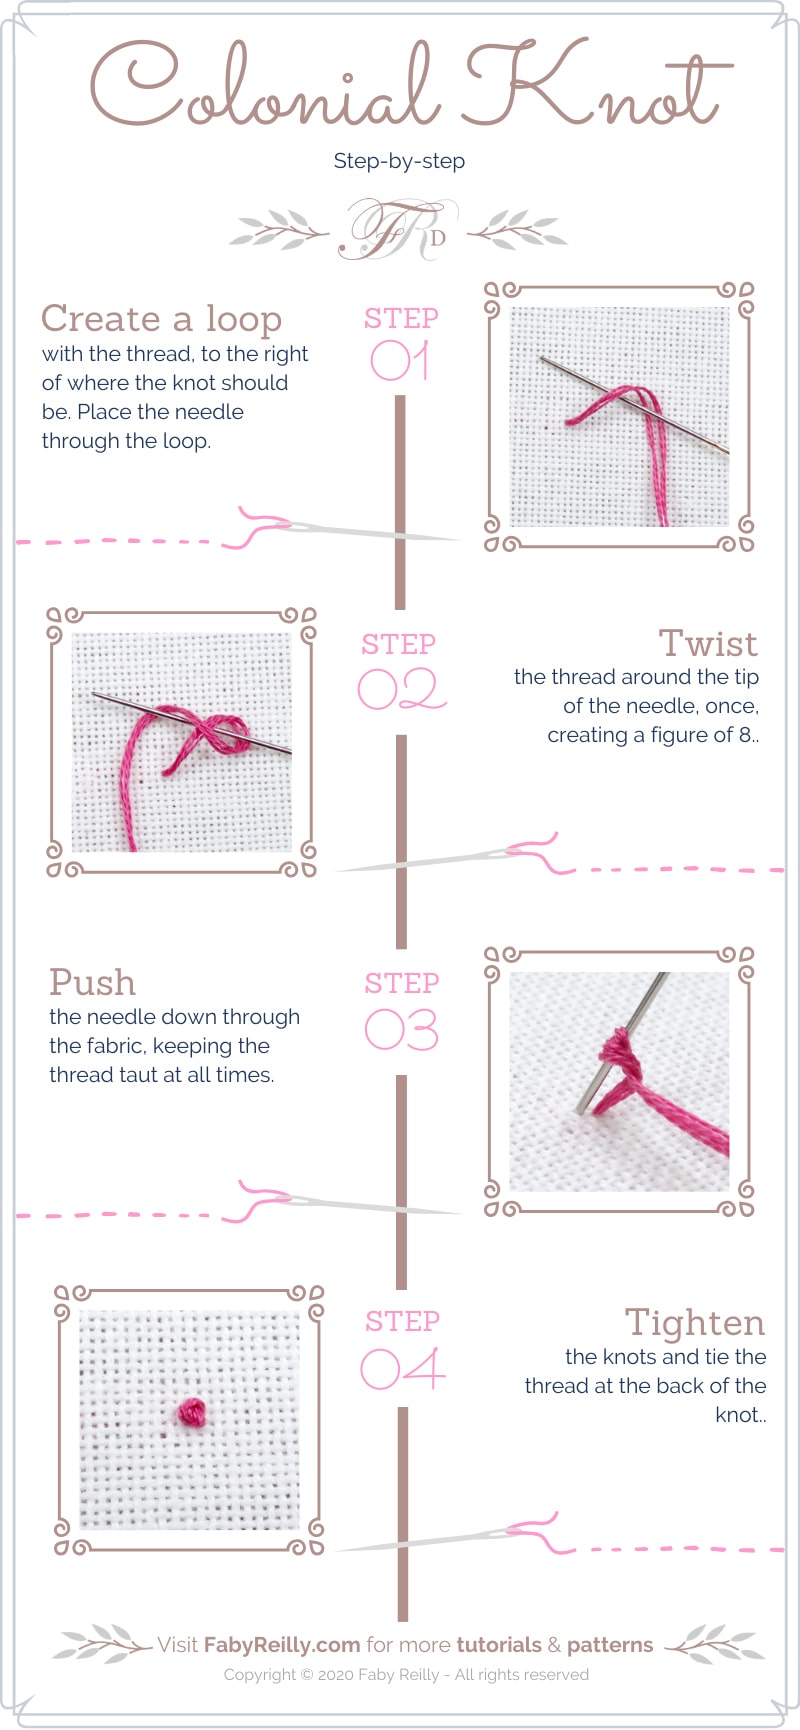
Colonial Knot:
Now let’s look at the Colonial knot, which is actually easier to stitch, once you’ve got your head around it (still using 4 strands, here):
1 [Note: the knot on the left is the finished French knot, so that you can compare both knots] For the Colonial knot, you need to create a bridge with the thread, and place the needle under it. That’s the bit that’s most likely to mess with your brain, if you’re used to French knots! Notice how the thread twists to the right rather than the left, so you cannot twist it around the needle. That’s why you’ve got to create the loop first (the “bridge”) THEN put the needle through it. This way, it’s a piece of cake!


2 Then twist the thread around the tip of the needle, once, creating a figure of 8.


3 As we did earlier for a French knot, tighten the thread around the needle and keep it tight with your left hand, while you push the needle down through the fabric just next to where you started the stitch.


Here they are side by side, French knot on the left, and Colonial knot on the right:

You can’t really tell the difference, can you, except that the Colonial knot is possibly slightly neater? Definitely MY favourite! What about you? Let me know how you get on with these pesky knots!
Fancy seeing it stitched in action? Here’s a short video:
Fancy trying out your new skills? Here’s a selection of patterns to do just that:


Shall we recap?

Happy stitching!

What do you think?